


|
|
|
|
||
|
||||||||||||||
| School Postcode: LN2 3JB | DCFS number: | |||||||||||||
| Staff member who developed this case study: | Ben Price | |||||||||||||
| Email contact: | benprice_iw@hotmail.com | |||||||||||||
| School telephone: 01673 866900 | No. on roll: approx. 1400 pupils | |||||||||||||
| Brief pen picture of school: | William Farr School is a rural 11-18 C of E fully comprehensive school set in the village of Welton-by-Lincoln. It has approximately 1400 pupils.
The D&T department is a lead subject in school which has Science College, Raising Achievement, T & L and Leading Edge status. William Farr has recently changed it’s specialism from Technology to Science and Design and Technology has since been made optional at GCSE. The department has 5 full time teachers and two part time teachers, with 1 full time and 2 part time technicians. It has 2 workshops, 1 electronics lab, a CAD suite, a graphics suite, 2 food rooms, a 6th Form work room and a textiles room. At Key Stage 3 pupils have two, one hour lessons where they carousel through Electronics, Food, Graphics, Resistant Materials and Textiles. GCSE is now optional and students have the choice of Systems and Control Technology with Electronics, Food Technology, Graphic Products, Resistant Materials Technology and Textiles Technology. Pupils have two, one hour lessons one week, and three the next. At A-Level students opt into Product Design (3D), Art Textiles or Art Graphic Design. |
|||||||||||||
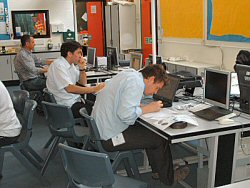
1. The Teacher CPD Course: |
||||||||||||||
| The Project Brief: I intend to design and make an electronic device which will act as an audio amplifier from an external device, for example, an MP3 player. It should be able to be used with a range of MP3 players and have a stereo output. There should be some sort of visual output to give the user stimulation, interest and pleasure. |
||||||||||||||
Specification:
|
||||||||||||||
Concept Sketches: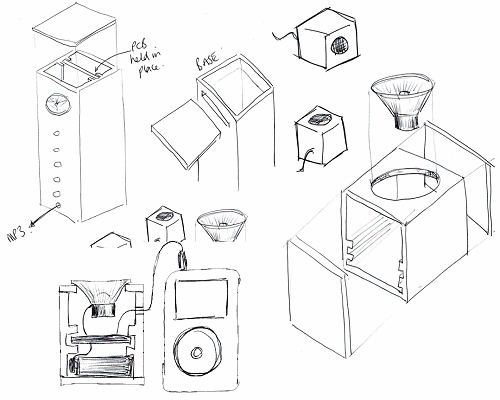 |
||||||||||||||
| 1. Electronic circuit development: | ||||||||||||||
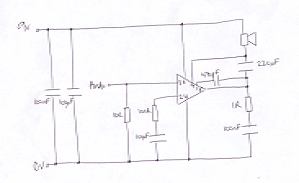
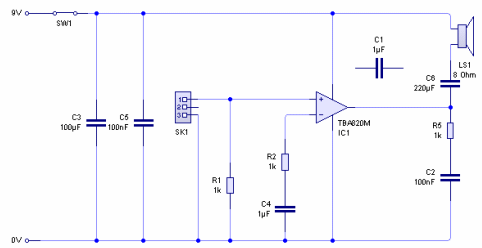
a) Circuit diagrams/schematics |
||||||||||||||
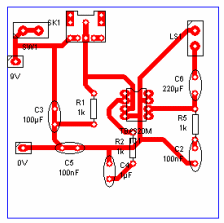
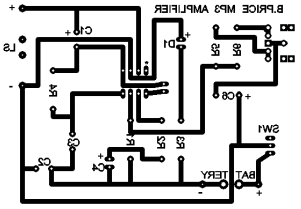
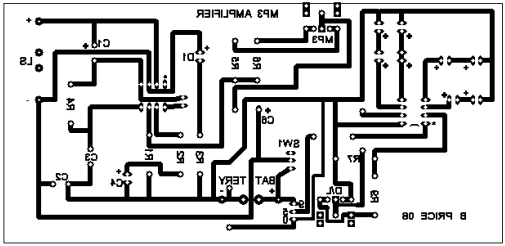
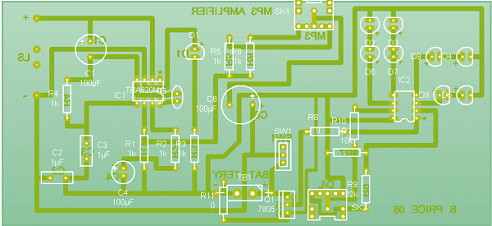
b) PCB artwork |
||||||||||||||
c) Program details |
||||||||||||||
The Final Circuit Board:
|
||||||||||||||
| Commentary: Both parts of the circuit consolidate my knowledge of electronics. I understand the Op-amp, but I am familiarising myself with smoothing capacitors. The PIC side of the board is what I teach in Year 9 with Genie08M, and at GCSE, I use Genie18+ with my students.
Although I had really wanted to produce a PCB which played in-stereo (two speakers), time limited me to a mono circuit (one speaker). I also wanted to push my knowledge in PICs, so I used a Genie08, which again, if I had more time would have preferred to challenge myself to a Genie14 or Genie18. The PIC is independent to the Op-amp circuit, but ideally, I would have like to link the two and get the LEDs to pulse to the beat of the music. |
||||||||||||||
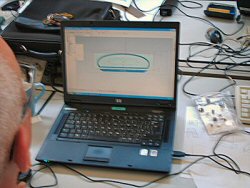
2. CAD/CAM Development:
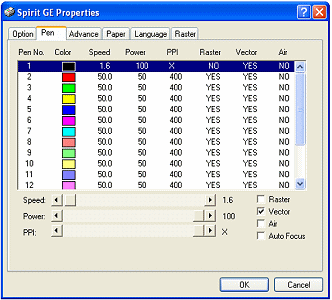
CAD/CAM Post Processing
|
||||||||||||||
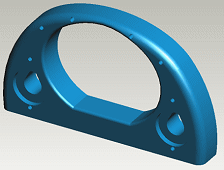
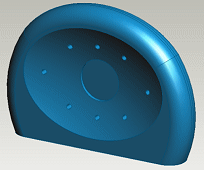
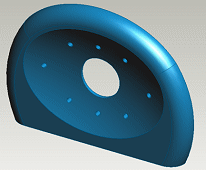
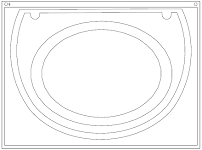
Final CAD Design: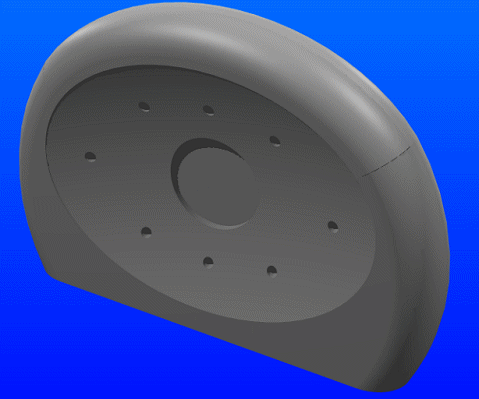 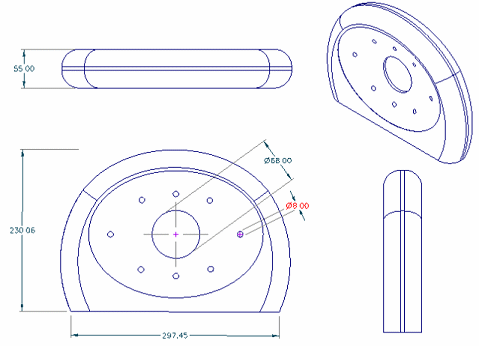 |
||||||||||||||
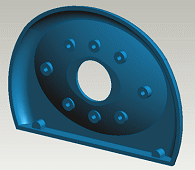
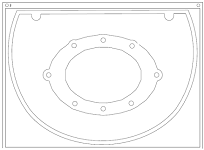
CAM Manufacture:
|
||||||||||||||
| Commentary: My ideas are usually a bit ‘blue sky’ and they have to be altered to fit. Although I was designing a product for children in Year 8 and Year 9, my product had to look modern, expensive and contemporary to mirror those on the market.
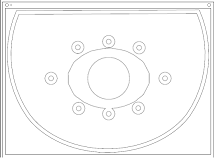
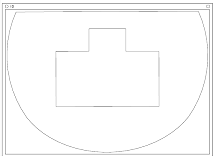
My initial idea would use an iPod docking station, but this would not lend it towards other types of MP3 players, so I substituted the iDock for a jack socket. I then realised that although a 3D Printer was available to use, my initial design would be too big and take up too much powder which was very costly. So it was back to the drawing board. My design was then altered to be produced on a piece of Styrofoam on the Boxford Router. The void in the middle was substituted for an indented back, to incorporate one speaker, having decided to use one (mono) rather than two (stereo). That meant that the base of the product wouldn’t have to be as big because it wouldn’t have to house two speakers. The Styrofoam could be routed out, fillered and sprayed up to give it a professional look. Due to the complexity of curves, lines and deformed faces, the Boxford post processor software wouldn’t accept it. And I had to look for other ways to produce the product. Then I decided to produce my design in slices by rapid prototyping the finished product in 3mm Medium Density Fibreboard. I did this by taking the 3D Pro/DESKTOP images and exporting it as an STL file and post processing it through a piece of software called Rapid Pro. It then output each slice as a 2D drawing saved as a PDF file which could be attached to my laser cutter back at school. The finished product could then be cut out, fillered and sprayed up. Although I wanted to use a piece of CAD/CAM hardware which pushed the boundaries, due to the complexity of the product, and time, I finished the product on the laser cutter I had in school, which was something I was familiar with. |
||||||||||||||
2. The Student Scheme of Work |
||||||||||||||
| Aimed at Key Stage: 3 (Year 8 Gifted and Talented) | ||||||||||||||
| Estimated time available for project: 5 periods of 60 minutes (One day off timetable). | ||||||||||||||
| National Curriculum PoS covered by Scheme of work:
Brief: To design and make an amplifier including it’s casing, which can be attached to a generic MP3 player. Context: Young people to listen to their music through their earphones, or expensive MP3 audio devices. These devices are not particularly portable and are quite expensive for a young person. A robust, durable casing is needed to house the PCB. Specification:
|
||||||||||||||
| The Scheme of Work: | ||||||||||||||
List the design decisions (from David’s Barlex’s Nuffield D&T pentagon) you will be asking pupils to make. Conceptual – What does it do? Focussed practical task. Everyone makes a generic MP3 amplifier design due to a low knowledge and understanding of electronics. Aesthetic - What does it looks like? Marketing – Who is it for? What age range will it be for? (5-15) (16-20) (21-29) (30+) Technical – How it works? Constructional – How it fits together? |
||||||||||||||
| Individual Lesson Plans: | ||||||||||||||
| Student Outcomes: | ||||||||||||||
| Commentary: | ||||||||||||||
![]()
Site developed by Amethyst Consultancy 2008
 William Farr Comprehensive School