


|
|
|
|
||
|
|||||||||||||||||||||||||||||||||||||||||||||||||||||||||||||||||||||||
| School Postcode: LN4 4PN | DCFS number: 5409 | ||||||||||||||||||||||||||||||||||||||||||||||||||||||||||||||||||||||
| Staff member who developed this case study: | Su Colman | ||||||||||||||||||||||||||||||||||||||||||||||||||||||||||||||||||||||
| Email contact: ms.colman@gartree.lincs.sch.uk | |||||||||||||||||||||||||||||||||||||||||||||||||||||||||||||||||||||||
| School telephone: 01526 342379 | No. on roll: 520 | ||||||||||||||||||||||||||||||||||||||||||||||||||||||||||||||||||||||
| Brief pen picture of school: | Gartree Community School is a small, friendly secondary covering key stages 3&4. In Technology we offer GCSEs in Food, Graphics, Resistant Materials and Textiles. | ||||||||||||||||||||||||||||||||||||||||||||||||||||||||||||||||||||||
1. The Teacher CPD Course: |
|||||||||||||||||||||||||||||||||||||||||||||||||||||||||||||||||||||||
| The Project Brief: I am developing a new course for year 9, as I am delivering an RMT/Graphics element of the carousel that I am calling Product Design. The plan is to design and make a product and packaging with a graphical element using resistant materials and incorporating systems and control and some CADCAM that will be suitable for the new POS. This year students have had little or no electronics learning before, but next year, the groups will have done an assignment with LEDs and soldering. |
|||||||||||||||||||||||||||||||||||||||||||||||||||||||||||||||||||||||
Specification:
|
|||||||||||||||||||||||||||||||||||||||||||||||||||||||||||||||||||||||
Concept Sketches:
|
|||||||||||||||||||||||||||||||||||||||||||||||||||||||||||||||||||||||
| 1. Electronic circuit development: | |||||||||||||||||||||||||||||||||||||||||||||||||||||||||||||||||||||||
a) Circuit diagrams/schematics |
|||||||||||||||||||||||||||||||||||||||||||||||||||||||||||||||||||||||
b) PCB artwork |
|||||||||||||||||||||||||||||||||||||||||||||||||||||||||||||||||||||||
c) Program details |
|||||||||||||||||||||||||||||||||||||||||||||||||||||||||||||||||||||||
| The Final Circuit Board: | |||||||||||||||||||||||||||||||||||||||||||||||||||||||||||||||||||||||
| Commentary: | |||||||||||||||||||||||||||||||||||||||||||||||||||||||||||||||||||||||
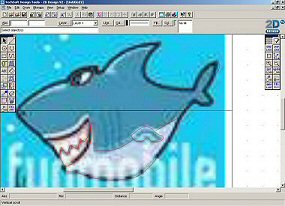
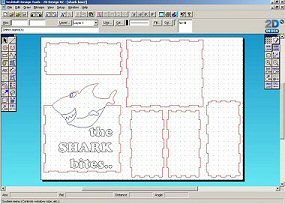
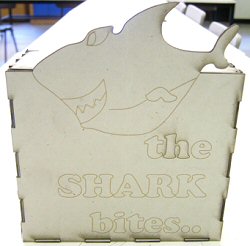
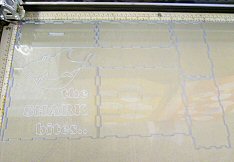
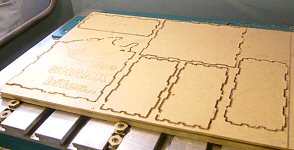
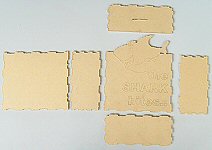
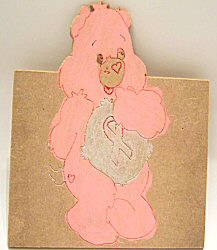
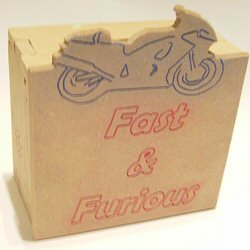
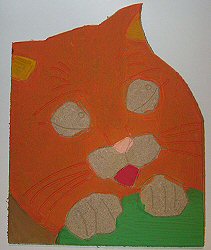
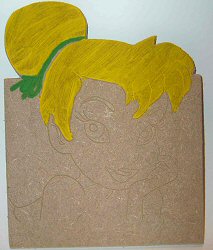
| 2. CAD/CAM Development: I have been using 2D Design Tools to produce the outlines that can be used to drive either the laser cutter or the router. I imported a .bmp file of a shark to create the outline for the top edge.
I used the line tool and snap to grid function to make an accurate outline to give comb joints to assemble the box.
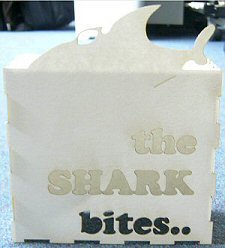
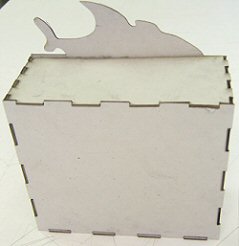
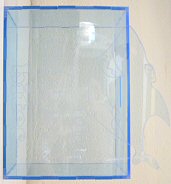
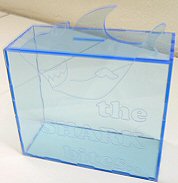
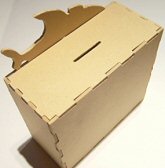
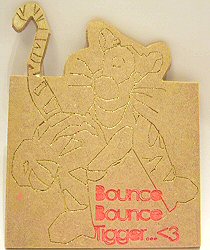
I corrected the errors in the top and base walls, and cut a second prototype on the laser cutter, using thicker card and rastering the text and outline of the shark. I was happy with the fit, so we cut the box in blue light collecting acrylic.
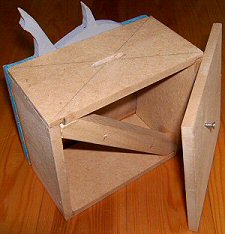
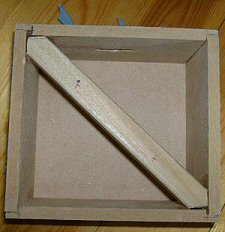
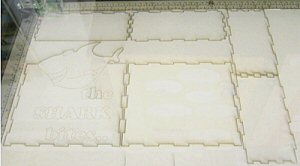
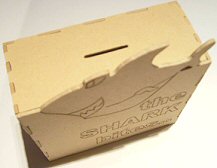
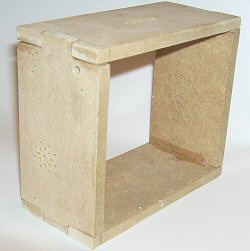
This worked extremely well. I decided to try the file on the router, cut in MDF. I added the required features (line thicknesses, sprues) and 3mm MDF was tacked into place in the router. I used a pad saw to cut the sprues, then filed the internal corners to square them out and allow them to fit. After sanding, the box assembled well.
|
|||||||||||||||||||||||||||||||||||||||||||||||||||||||||||||||||||||||
| Final CAD Design: | |||||||||||||||||||||||||||||||||||||||||||||||||||||||||||||||||||||||
| CAM Manufacture: | |||||||||||||||||||||||||||||||||||||||||||||||||||||||||||||||||||||||
| Commentary: | |||||||||||||||||||||||||||||||||||||||||||||||||||||||||||||||||||||||
2. The Student Scheme of Work |
|||||||||||||||||||||||||||||||||||||||||||||||||||||||||||||||||||||||
| Aimed at Key Stage: 3 (year 9) | |||||||||||||||||||||||||||||||||||||||||||||||||||||||||||||||||||||||
| Estimated time available for project: 39 periods of 50 minutes | |||||||||||||||||||||||||||||||||||||||||||||||||||||||||||||||||||||||
| National Curriculum PoS covered by Scheme of work: 1.1.a, 1.1.b, 1.3.c, 1.4.a, 1.4.b, 2a-h, 3b, 3j, 3m, 3n, 3o, 3p |
|||||||||||||||||||||||||||||||||||||||||||||||||||||||||||||||||||||||
| The Scheme of Work: Brief: “A specialist chain of gadget shops is looking for a new design for a money box to appeal to teenagers.They want it to include lights and sound, and appeal to boys and girls.” Specification:
|
|||||||||||||||||||||||||||||||||||||||||||||||||||||||||||||||||||||||
| List the design decisions (from David’s Barlex’s Nuffield D&T pentagon) you will be asking pupils to make. Conceptual - teacher decision Technical - teacher decision Aesthetic - outline/teacher, detail/student Constructional - outline/teacher, detail/student Marketing - outline/teacher, detail/student (actual target market and packaging for the product is part of the assignment) |
|||||||||||||||||||||||||||||||||||||||||||||||||||||||||||||||||||||||
Student Outcomes:
|
|||||||||||||||||||||||||||||||||||||||||||||||||||||||||||||||||||||||
| Commentary: This has been an invaluable opportunity to develop a new scheme of work and also to stretch myself and my confidence and understanding in electronics. For the assignment I made several models using laser cut card and acrylic, a facility I don’t have at school, but the clear acrylic model has proved invaluable in being able to demonstrate to students how the final product works. They really like the look of the acrylic and many have asked me if we can get a laser cutter! To make the product accessible at my school, I have made a few changes to the design. Some areas have been modified to ensure that the students can complete the product in the available 13 week slot, some areas to make the product affordable. | am currently running the scheme of work with two groups of year 9 students. It has been enthusiastically received, and many of the students have put in extra time at lunchtimes to “do a bit more on my project, Miss”. The two groups I have are the top and the lowest ability in the cohort, and both are enjoying the work and are especially pleased with the output from the router. They are amazed that the paths they create in the software are so faithfully reproduced by the machine - it makes the process of CAD CAM very real to them. The CAM fronts are the main bottleneck, but the outcomes are so good, I could not go back to having the students cut their own by hand. We haven’t yet started the electronics part of the making, that will come after the submission deadline for this assignment. All of the students who were at the school last year have used soldering irons and some components with me in the Year 8 assignment, but using a PCB is new and one of my main concerns is the level of frustration they are likely to encounter as they try to complete their boards and make mistakes, particularly in the lower sets. I presented the project to two of our school governors as part of a departmental feedback session and was delighted to find that the governors concerned are both electronics engineers and have volunteered to come into school and help me with trouble shooting circuit boards when the time comes. |
|||||||||||||||||||||||||||||||||||||||||||||||||||||||||||||||||||||||
![]()
Site developed by Amethyst Consultancy 2008
 The Gartree School